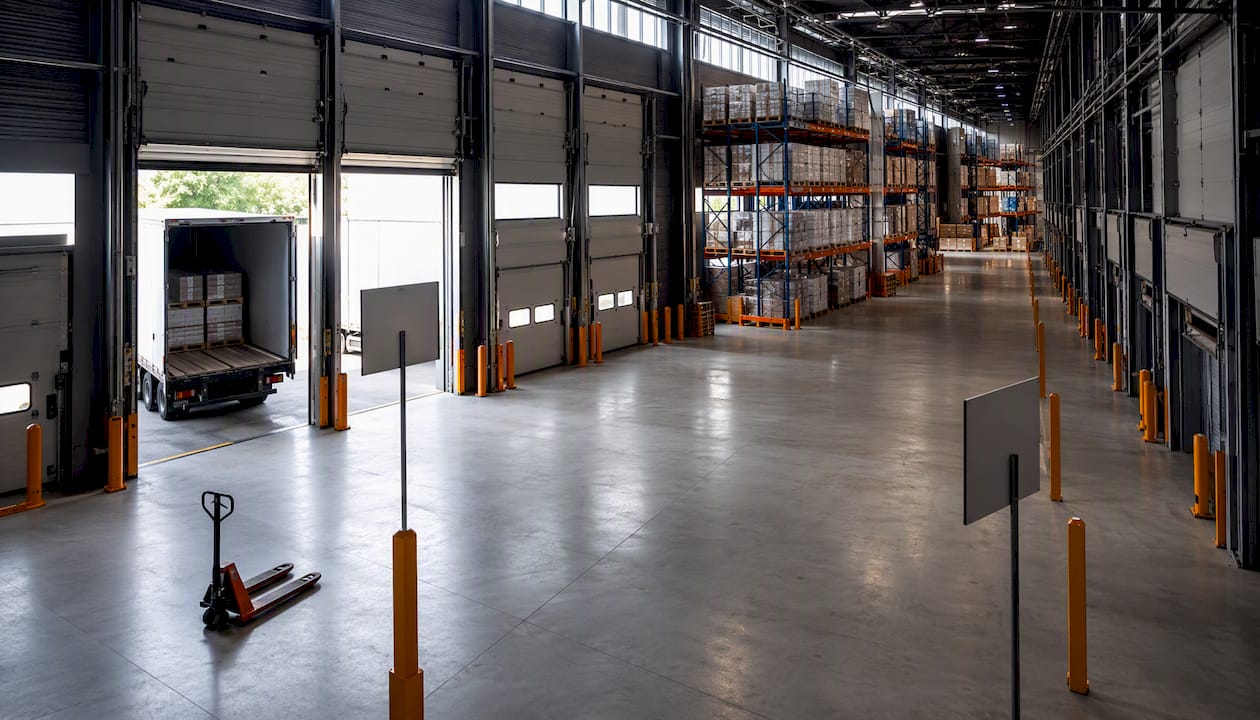
Common warehouse layout options and how to pick one
By Michael Law · Industrial Real Estate Broker, Lennard Commercial Realty
Three layout shapes cover most of what you’ll see on a warehouse floor: I-shaped (also called through-flow, with receiving on one end and shipping on the other), U-shaped (both docks on the same wall), and L-shaped (docks on perpendicular walls). If you’re running high-velocity throughput with steady one-way movement, I-shaped usually wins. If your site has limited dock frontage or you need shared staff and equipment across receiving and shipping, U-shaped is the workhorse. If you’ve got an oddly-shaped lot or need to physically separate inbound from outbound traffic, L-shaped often makes more sense than forcing a rectangle that doesn’t exist.
Most operators never need anything more exotic than these three. But the common flow patterns identified across practitioner guides also include hybrids and zoned variants for specific situations, which we’ll get into.
Here’s the one-line cheat sheet:
- I-shaped (through-flow): Best for high-throughput, high-volume operations with predictable one-way flow, e-commerce fulfillment, and cross-docking.
- U-shaped (shared dock wall): Best for sites with limited dock frontage, operations needing shared labour and equipment between inbound and outbound.
- L-shaped (perpendicular docks): Best for corner lots, irregular building footprints, or operations needing physical separation between receiving and shipping traffic.
Pro Tip: Don’t pick a layout shape based on what looks efficient on paper. Walk the building shell first. Column spacing, dock door count, and clear height often eliminate one or two options before you even get to picking strategy.
Key Takeaways
Choosing among common warehouse layout options comes down to matching I-shaped, U-shaped, or L-shaped flow to your order profile, building shell, and growth plan, then validating that choice against dock count and column spacing before signing a lease.
| Point | Details |
|---|---|
| Three core shapes dominate | I-shaped suits high-throughput flow, U-shaped suits shared docks, L-shaped suits corner lots. |
| Density trades off against travel distance | Denser storage like drive-in racking slows picking; open layouts speed travel but store less. |
| Storage and picking policy interact with shape | The same building shape performs differently depending on zone picking versus cluster picking. |
| Building shell often decides the shape | Column spacing, clear height, and dock positions can eliminate options before operations planning starts. |
| Complex operations warrant simulation | Run a discrete-event model when multiple picking policies compete for the same layout. |
| Site selection is a layout decision | Michael Law |
Table of Contents
- What are the common warehouse layout options?
- What other warehouse layout designs should you consider?
- How do storage type and pick modules change your layout?
- How do aisle orientation and dock placement affect flow?
- Which layout performs best on the KPIs that matter?
- How do you choose the right warehouse layout?
- What a broker actually checks before recommending a layout
- What most warehouse managers get wrong about layout planning
- How Michael Law | Lennard Commercial helps you match layout to building
- Sources
- FAQ
What are the common warehouse layout options?
Each of the three core shapes routes goods differently, and that routing decision ripples through labour cost, safety, and how much product you can actually store.
I-shaped (through-flow) layout
Trucks arrive at one end of the building, goods move through receiving, storage, and picking in a straight line, then exit through shipping doors at the opposite end. There’s no crossover between inbound and outbound traffic, which is the whole point.
Pros:
- Minimal congestion because inbound and outbound flows never cross
- Fastest average travel distance for high-volume, one-directional movement
- Easiest layout to automate with conveyors or automated guided vehicles
- Simple to scale by adding storage bays along the flow path
- Lower collision risk between forklifts and pedestrians
Cons:
- Requires a long, rectangular building footprint that not every site offers
- Needs dock doors on two separate walls, which some buildings can’t support
- Less efficient for operations with heavy cross-docking or frequent returns
- Can waste square footage if the building is closer to square than rectangular
U-shaped (shared dock) layout
Receiving and shipping docks sit on the same wall, and goods flow in, get stored in the middle of the building, then flow back out the same side. Staff and equipment work both ends of the building without walking the full length.
Pros:
- Works on buildings with only one wall suited to dock doors
- Shares labour, forklifts, and dock staging between inbound and outbound
- Reduces total dock frontage needed, useful on smaller or irregular lots
- Good fit when receiving and shipping volumes fluctuate independently
Cons:
- Higher congestion risk at the shared dock wall during peak hours
- Inbound and outbound traffic can cross paths inside the building
- Travel distance to the back of the warehouse and back again adds up
- Requires careful staging area planning to avoid truck queuing conflicts
L-shaped (perpendicular dock) layout
Receiving sits on one wall, shipping on an adjoining wall at roughly ninety degrees. This shape shows up most often on corner properties or buildings where the shell dictates dock placement rather than the other way around.
Pros:
- Fits irregular or corner lots better than a straight rectangle
- Physically separates inbound and outbound traffic without a full through-flow footprint
- Useful when zoning or site access restricts where docks can go
- Can support two distinct traffic patterns for multi-tenant or multi-use buildings
Cons:
- Travel paths inside the warehouse are less predictable than I-shaped flow
- Corner areas near the bend can become dead zones if not planned carefully
- Harder to standardize picking routes compared to a straight-line layout
- Automation equipment like conveyors is trickier to route around the corner
What other warehouse layout designs should you consider?
Beyond the three core shapes, several variants solve specific operational problems that a plain rectangle or L-shape can’t. Some of these get layered on top of I, U, or L shapes rather than replacing them.

Modular/zoned layouts divide the floor into distinct zones by client, product category, or process step, each with its own storage and picking rules. This shows up constantly in multi-client third-party logistics operations where Client A’s inventory can’t mix with Client B’s, and each zone might even use a different racking system.
Fishbone (flying-V) layouts angle picking aisles toward a central point rather than running them straight, which shortens travel distance for operations doing high volumes of manual, cart-based picking. It’s more common in retail distribution centres with tens of thousands of SKUs than in bulk pallet storage.
Cross-aisle layouts insert additional aisles perpendicular to the main picking aisles, breaking long runs into shorter segments. Spare-parts warehouses and operations with a wide spread of SKU velocity often use this to avoid forcing slow-moving pickers to walk the entire length of the building for a single item.
Mezzanine and hybrid layouts add a second level, usually for lighter goods, overflow storage, or office and pack-out space, when the building offers enough clear height but not enough floor footprint. This is where structural engineering matters as much as layout theory. A mezzanine specialist can tell you quickly whether your column grid and floor load capacity can actually support the additional level you’re picturing.
- Multi-client 3PL operations lean toward modular/zoned layouts to keep client inventory separated and auditable.
- High-SKU e-commerce fulfillment centres often adopt fishbone or cross-aisle patterns to cut picker travel time.
- Spare-parts and MRO warehouses use cross-aisles heavily because SKU count is high but volume per SKU is low.
None of these variants are free. Column spacing, clear height, and the building’s existing dock positions constrain what’s realistically achievable, and structural factors in the building shell often decide the question before an operations plan even gets drawn up.
How do storage type and pick modules change your layout?
Layout shape sets the skeleton. Storage system and pick module design determine how well that skeleton actually performs.
Static storage — selective pallet racking, block stacking — gives you flexibility to store almost anything but sacrifices density. Dynamic storage — pallet flow racks, drive-in racking, automated storage and retrieval systems (AS/RS) — packs more product into the same footprint but restricts access, usually to first-in-first-out or last-in-first-out sequencing. Racking selection determines a long list of downstream variables, including aisle width, whether a forklift or narrow-aisle lift can service it, and whether automation is even feasible in that racking type.
Pick modules layer on top of whichever storage system you choose:
- Dedicated pick lanes work best for high-velocity SKUs with consistent order volume.
- Zone picking splits the warehouse into sections, with pickers assigned to a zone rather than an entire order.
- Cluster picking has one picker fulfilling multiple orders in a single pass through the aisles.
The practical rule most operators land on: put your fastest-moving SKUs, your A-class items in ABC analysis, closest to the shipping dock. Slower movers go deeper into the building. Slotting fast movers near dispatch and applying class-based storage can meaningfully cut picking walk distance, though the exact savings depend heavily on your order profile and how skewed your SKU velocity actually is.
Pro Tip: If you’re not sure whether your SKU velocity is skewed enough to justify ABC slotting, pull several months of pick data and rank SKUs by pick frequency. A strong skew toward a small percentage of SKUs accounting for a large share of picks supports dedicated fast-mover zones near the dock.
How do aisle orientation and dock placement affect flow?
Small decisions here create outsized problems later. Aisle direction and dock position determine travel distance and congestion far more than most first-time layout planners expect.
Vertical aisle orientation, running aisles perpendicular to the dock wall, tends to shorten travel for operations moving goods directly between storage and a single dock wall, which fits U-shaped buildings well. Horizontal aisle orientation, running parallel to the dock wall, often suits I-shaped through-flow buildings where product moves the length of the building rather than straight to one wall.
Dock placement changes the whole equation:
- Shared wall docks (U-shaped) reduce total dock frontage needed but concentrate truck traffic and staging demand in one area.
- Opposite-end docks (I-shaped) spread truck activity across two walls, reducing queuing but requiring more total perimeter dock access.
- Perpendicular docks (L-shaped) separate traffic physically but can create awkward staging geometry near the building’s corner.
Consulting practice built around operational efficiency consistently pushes the same principle: separate pedestrian and material flows and design for linear, continuous movement wherever the building allows it. Crossing paths between forklifts and walking staff is one of the more preventable sources of warehouse incidents.
Before finalizing aisle and dock decisions, run through this checklist:
- How often do you need cross-aisles to break up long picking runs?
- Are pedestrian safety lanes physically separated from forklift traffic?
- How much staging square footage do you need at each dock for peak-hour truck volume?
- Does your dock door count match your daily truck arrival pattern, or will trucks queue?
Which layout performs best on the KPIs that matter?
Every layout decision comes down to one tension: storage density against travel distance. Pack the building tighter with drive-in racking or block stacking, and you’ll fit more pallets, but pickers and forklifts travel farther and slower to reach product buried behind other loads. Open the layout up with wide aisles and selective racking, and travel gets faster, but you sacrifice the pallet positions that dense storage would have given you.
Discrete-event simulation research backs this up with a more nuanced point: layout shape doesn’t operate independently. It interacts with your storage policy and picking/routing rules, so the same I-shaped building can produce very different throughput numbers depending on whether you’re running zone picking versus cluster picking on top of it. That’s why testing combinations, not just picking a shape in isolation, matters for high-volume operations.
Here’s how the three core shapes generally compare across the dimensions that actually drive decisions:
| Dimension | I-shaped | U-shaped | L-shaped |
|---|---|---|---|
| Best for | High-throughput, one-way flow | Limited dock frontage, shared labour | Corner lots, irregular footprints |
| Storage density | Moderate to high | Moderate | Moderate |
| Average travel distance | Lowest for linear flow | Higher due to shared-wall back-and-forth | Variable, depends on corner geometry |
| Throughput suitability | Best for high-volume, steady flow | Good for fluctuating dual-direction volume | Good for split traffic patterns |
| Equipment/automation fit | Easiest for conveyors and AGVs | Moderate, needs careful staging | Harder to automate around the bend |
| Complexity/cost | Lower if building shell allows it | Moderate | Higher due to irregular geometry |
| Scalability | Strong along the flow axis | Moderate, limited by shared wall | Limited by lot shape |
| Safety/congestion risk | Lowest, flows don’t cross | Higher at shared dock wall | Moderate, corner zones need attention |
How do you choose the right warehouse layout?
For most e-commerce fulfillment and cross-dock operations, start with I-shaped and only deviate if the building shell won’t support it. Multi-client 3PLs generally do better with a modular layout layered inside whichever core shape the building offers. Manufacturing operations with heavy work-in-progress movement often end up closer to U-shaped, since production flow rarely respects a straight in-out pattern anyway.
Run through this checklist before committing:
- Map your order profile and SKU velocity. How many distinct SKUs, and how skewed is pick frequency across them?
- Measure your building footprint and dock count. Does the shell physically support I-shaped through-flow, or does it force U or L?
- Assess equipment and automation readiness. Are you running manual pallet jacks today, or is AS/RS or conveyor automation realistic in three years?
- Define your labour model. Shared staff across inbound and outbound favours U-shaped; dedicated teams per function favour I-shaped.
- Check safety and ergonomic requirements. Does the layout allow separated pedestrian lanes and reasonable reach heights for manual picking?
- Plan for growth. Can the layout add storage bays or a mezzanine without a full redesign in three to five years?
- Confirm cost and permitting realities. Racking upgrades, dock additions, and mezzanine construction all carry different permitting timelines.
Cost drivers worth flagging early: racking type (selective racking runs cheaper per position than drive-in or pallet flow, but sacrifices density), dock door additions (structural and permitting costs vary by municipality), and mezzanine construction (engineering review adds weeks before construction even starts). A step-by-step tenant fit-out plan typically runs several months from lease signing to operational readiness, and layout changes discovered late in that process are the most expensive to fix.
Red flags that should trigger a deeper simulation model rather than a rule-of-thumb decision: order volume growing faster than your current pick rate can absorb, multiple picking policies competing for the same aisle space, or a building shell that only marginally fits your preferred shape. When any of those show up, academic layout interaction research suggests modelling storage, picking, and routing combinations together rather than guessing which one will bottleneck first.
What a broker actually checks before recommending a layout
Touring a candidate building tells you things a floor plan drawing never will. Column bay spacing determines whether your preferred racking configuration fits without redesigning aisle widths. Clear height sets whether a mezzanine or high-density racking is even on the table. Dock door count and position dictate whether you’re forced into U-shaped regardless of preference. Floor load capacity determines whether that AS/RS system your operations team wants is structurally viable.
A tenant came to us convinced they needed a 200,000-square-foot building for an I-shaped through-flow operation, based purely on a generic layout template they’d seen online. Once we toured available GTA buildings together, the column grid on every site in their budget forced compromises the template never accounted for. We ended up right-sizing them into a smaller building with a modular zoned layout that fit their actual SKU count, and they saved on both rent and racking costs.
Practical checks worth running on any building tour:
- Column spacing relative to your target rack bay width
- Clear height against your storage system and any mezzanine plans
- Number and position of dock doors relative to truck volume
- Yard access and trailer staging space for peak-hour queuing
- Permitted use classifications for your specific operation
If your operation is complex enough that three or four layout options all seem plausible on paper, that’s usually the signal to call in outside help rather than guess. A broker who tours buildings regularly across Mississauga, Brampton, Vaughan, and the broader GTA industrial market can flag structural dealbreakers before you sign a lease that locks you into a layout that never fits your operation.
What most warehouse managers get wrong about layout planning
The mistake I see most often isn’t picking the wrong shape. It’s picking a layout on a spreadsheet before ever touring the actual building. Operations teams design the “ideal” flow, hand it to a broker, and then discover the column grid or dock count rules out half of what they’d planned. By that point, they’ve often already signed a letter of intent.
The second mistake is treating layout as a one-time decision. Order profiles shift, SKU counts grow, and a layout that worked perfectly at 50,000 square feet often creaks at 90,000. Building in room to add cross-aisles, a mezzanine, or a second pick zone from day one costs far less than retrofitting three years in.
Get a walkthrough of your specific operation and building options before you commit to a lease or a redesign. It’s a lot cheaper to fix a layout on paper than after the racking is bolted down.
How Michael Law | Lennard Commercial helps you match layout to building
Picking the right layout shape only matters if you can find a building whose column grid, clear height, and dock configuration actually support it. Michael Law | Lennard Commercial spends its time doing exactly that kind of matching across the GTA industrial market, comparing your operational plan against real available space instead of a generic floor plan template.
If you’re weighing an I-shaped through-flow layout against a U-shaped alternative because your current space can’t support either cleanly, that’s a site selection problem before it’s a layout problem. Michael Law | Lennard Commercial handles tenant representation across Toronto, touring candidate buildings, checking structural fit against your operations plan, and negotiating lease terms that account for the fit-out work your chosen layout will require. For occupiers looking specifically in growing corridors, current industrial listings in Newmarket show what’s available right now for operations that have outgrown their current footprint. Reach out to start a building search built around the layout your operation actually needs, not the one your current lease forces on you.
Sources
Different sources serve different stages of layout planning. Use them accordingly rather than treating any single guide as the final word.
- A framework for supporting warehouse design
- Warehouse Design: Building + Layout Complete Guide | PEB Steel
- Logistics Excellence: Warehouse, Layout, and Flows
- Warehouse Layout Design: A Complete Guide | Hammerhead
- Warehouse layout design best practices (NetSuite resource)
FAQ
What are the most common warehouse layouts?
The three most common are I-shaped (through-flow, docks on opposite walls), U-shaped (docks on the same wall), and L-shaped (docks on perpendicular walls). Most facilities build around one of these three, sometimes layered with modular or zoned variants.
What are the 7 types of warehouse layout?
Beyond the three core shapes, common variants include modular/zoned, fishbone (flying-V), cross-aisle, mezzanine/hybrid, and flexible or mobile layouts, though definitions vary across sources and not every guide counts the same seven.
What is the 5S rule in warehousing?
The 5S rule, sort, set in order, shine, standardize, and sustain, is a workplace organization method used to keep warehouse floors clean, labelled, and consistently arranged, though it addresses housekeeping more than overall layout shape.
What are the 7 types of warehouses?
Common warehouse categories by function include distribution centres, fulfillment centres, cross-dock facilities, cold storage, bonded warehouses, private warehouses, and public warehouses, though classification systems differ by source and industry.
How do I know if my building supports my preferred layout?
Check column bay spacing against your racking plan, clear height against any mezzanine or high-density storage plans, and dock door count and position against your target shape, ideally with a tour before signing a lease.
Recommended

About Michael Law
Managing Partner and Industrial Real Estate Broker at Lennard Commercial Realty. Representing tenants and landlords across Toronto and the GTA for 15+ years. Michael specializes in GTA industrial real estate — connect with Toronto's leading industrial broker at mlawrealestate.com/industrial-broker-toronto.